Tuesday, May 28, 2013

MDW Nails - OPI "Speak For Your Elf!" and "Dating a Royal"

Hey all - sorry for the delay on my MDW mani, it's been a busy day! To get this look, I originally painted my pinky-pointer with Essie's "Marshmallow", which you can't see anyway, then used a fine-tip brush to apply stripes of OPI's "Speak For Your Elf!", a holiday Ulta exclusive red glitter jelly shade. I eventually did a couple rounds of touch up, and deciding marshmallow wasn't cutting it, I just used acrylic paint for the white stripes.

Thumb nail is OPI's "Dating a Royal", one of my absolute favorite favorite favorite indigo blue shades. It's a crelly kinda formula, and depending on how you use it, it could be a one coater. It also dries surprisingly quickly, with a high-gloss finish. The stars I did in white acrylic paint as well, that way if I messed any of them  up, water would fix it up real quick. What do you think?? Sorry about the cuticles looking a tad messy, this was right after I did them and I was in a rush to celebrate!


And of course, I hope you all took some time out of the holiday weekend to remember and honor those who died serving and protecting the great ol' USA!

Happy Polishing!
-Maggie

Sunday, May 26, 2013

Sunday Funday's Gilded Tips - OPI's "I Theadora You" and "Glitzerland"

Happy Sunday everyone! Today I'm featuring a simple yet elegant manicure that I randomly came up with after deciding I got bored with a solid color. No offense to "I Theadora You", its a lovely pink crelly, however it took about 4-5 coats to get it totally opaque on my nails and after that I kinda just got bored with it. Therefore, I decided to jazz it up a bit with a thin gold tip, a look that I think I very well might feature in my upcoming wedding-looks post. I know, I keep promising it, and I still haven't finished.

I think these colors go really well together, given the fact that my skin tone wouldn't warrant me wearing "Glitzerland" on it's own, since it leans a bit greenish. However, with the pink balances it out quite nicely.
Indirect Sunlight

Shade
Hope you like!

Happy Polishing!
-Maggie

Wednesday, May 22, 2013

My first Franken - salvaging my bottle of Essie's "Shop Till I Drop"

For the loyal followers of my blog, some of you may remember my less-than lovely experience with a bottle I had purchased of Essie's "Shop Till I Drop". I admit, I hadn't done proper research on the color and though that due to the sheerness of it, the color in the bottle wouldn't have such a dreadful effect on my nails...FAIL.

To jog your memory, here's what it looked like when I purchased it - according to my boyfriend, my nails look "diseased"...he couldn't have been more right - ew!


image courtesy of madness84.blog.me

Deciding that I couldn't just throw it away, I made an attempt to salvage it and turn it into some of the other swatches I had seen of it, more of rosy pink.

 Funny enough, I ended up using another color I had obtained in that same purchase, Essie's "Rose Bowl" along with a bit of Essie's "Carry On" to dilute the color a bit.


Here's how it turned out! I currently have it painted over Red Carpet Manicure's "Camera Shy", a cloudy nude base color I figured would work well considering it's basically the same as my natural nail color. For those checking in, my current RCM manicure is almost 2 weeks in and still going strong!


A little more pinky than "Cute As A Button", this shade is probably my absolute new favorite, and it's not even a buyable shade! It's got such a yummy juicy jellyness to it that I can't bear to part with it now! Though I may go out and still buy the original "Shop Till I Drop" if I ever come across it, this jelly pinky color just reminds me so much of a ripe watermelon that I'm keeping it around for summer!

Anybody got a clever name for this one? I'm taking suggestions!

Happy Polishing!
-Maggie

Thursday, May 16, 2013

Let's Go Rangers! With Essie's "Aruba Blue" and some well placed striping tape!

Good afternoon, everyone! Today I'm featuring some nail art to support my beloved New York Rangers as they take on the Boston Bruins in the 2nd round of the NHL Playoffs. Had my nails been longer, I would have done the accent nail effect on all fingers, but alas, they are not. This is is all regular nail polish done over my Red Carpet gel manicure, still going strong after 4 days!

I also picked up another Red Carpet Manicure Color called "Perfect High Heels", a deep sparkly blue, which I couldn't wait to try out on my toes :) Hope you like!


Let's Go Rangers!!!
Happy Polishing!
-Maggie

Tuesday, May 14, 2013

Red Carpet Manicure LED Gel Kit - "Tre Chic" swatch

I apologize in advance, this post is pretty long.

So today I'm bringing you a quick review of Red Carpet Manicure's At-Home LED Gel System. My sister bought this for me for Christmas, and I haven't plucked up the courage until now to give it a whirl. Instead of purchasing the full "Pro 45 Starter Kit" (On SALE at Ulta.com) which includes their color "Red Carpet Reddy", she purchased the lamp and the "Must Haves Kit" which basically has everything except for any colors. Each color runs for $9.99 MSRP, and as I understand it can be bought at Ulta, Target, Harmon, and is popping up in places like Duane Read as well. My lovely sister purchased 2 for me ("Draped In Rubies" and "Toast of the Town"), and I picked up the 3rd ("Tre Chic") on clearance at Harmon for $5.99. You can see all 59 shades here.


I've heard that the lamp that I have (Pro Lamp) is definitely worth the investment. There's the other option of picking up the Portable LED Lamp, which costs half the price but A. takes twice as long and B. runs on batteries and tends to crap out. The lamp I have, as you can see below, looks a lot like the UV lamps you see at salons, with mirrors inside that reflect the light to amplify it. The fact that it plugs into an outlet also gives it a bit more oomph - each coat only takes 45 seconds to cure, as opposed to up to 3 minutes with the portable light.

My 3 Colors, plus the LED Pro Lamp


The Must Haves Kit (and the starter kit) comes with all of the products below as well, necessary to a successful gel manicure.


  • Purify - "Removes residue and cleanses the surface of the nail" - This is a mix of alcohol, acetone, and ethyl acetate that helps prep your bare nails, and also removes the tacky surface of the gel topcoat once it sets under the light.
  • Erase - "Removes RCM LED Gel Polish application in 10-15 minutes" - pretty sure pure acetone would work just as well. 
  • Prep - "Dehydrates the nail plate for maximum product adhesion to the nail" - This is almost the same as Purify, minus the acetone. It helps to ensure your nail beds aren't oily so that the product stays on well. Regular rubbing alcohol would probably work just as well.
  • Structure - "Bonds to the nail plate without any damage. Secures color." This is the base coat that goes on under the color.
  • Brilliance - "Final coat. Seals the application to a high shine." Great shine to seal in the color, is also resistant to Erase and needs to be buffed off before you can attempt to soak for removal. 
  • Revitalize - "Rehydrates the cuticle and the skin surrounding the nail." This cuticle oil smells LOVELY! Seems to do it's job as well. 
As you can see, the bottles are pretty tiny, though all coats of base, color, and top coat are meant to be thin, and therefore the product doesn't seem to get used up too quickly. You can see the difference in the bottles of "Purify" and "Erase" though, showing how much I used before my manicure and after. I used what I thought was a small amount on a cotton ball, though I may switch to cotton pads since they absorb less, therefore waste less.

On to the good stuff! Below is my very first Red Carpet Manicure, using 2 coats of "Tre Chic". I find the best way to apply this manicure is to do the 4 nails on the left hand first (minus the thumb) at once, then the 4 on the right hand, and then the 2 thumbs together. This means my 4 left fingers were finished base to top coat before I moved on to my right hand, and so on and so forth. It's hard to fit all 4 fingers plus your thumb in the lamp, so just trust me and do your thumbs together, last.

The application is really smooth on all coats. Make sure you 1. don't get it all over yourself. Be patient and use slow strokes. 2. Don't load up the brush...this will make sure you keep it even as well as it will keep it from bleeding into your nail bed. 3. Wrap your tips! You know the pros do it, make sure you do it! This will fortify your nail, keep the manicure from chipping or peeling, and thicken up the nail tip to keep it from cracking or splitting.

Below, I did the base coat, then 2 coats of Tre Chic, and then one coat of the top coat. Before I cured each color coat, I made sure to run around the cuticle bed with an acetone dipped brush to clean up any excess, as well as under the front of the nail. After I cured each coat, I also filed the sides with a metal file in case there was any more excess. I then applied the top coat *make sure to wrap the nail on each coat, especially the top coat!* and then wiped off the residue with Purify. I really love these results, and this color reminds me of a less pink version of OPI's "I Pink I Can", which I got in an acrylic/gel manicure once. Love the sparkle, but it's nude enough to be neutral. As you can see its a barely-there pink loaded up with a pearlescent micro glitter. Ooooooh!


The best part about this manicure is that I can apply regular polish over it, and use non-acetone remover in case I want to change the color up! Because this shade is so neutral, I don't envision it affecting any polish I might choose to apply over it, so this is a good base, plus it'll keep my nails strong as I try and grow them out again.

I took these shots after a shift at work, and it didn't even make a dent. I'm going to be pessimistic and give this manicure a week, since I have a very very bad habit of picking at the gel on the sides and near the cuticle, thought I've heard very good things about the lasting time on other manicures. 

In the mean time, I'll keep you updated on the condition of this manicure. I also picked up another bottle of the Gelous Nail Coat from Sally Beauty supply, to use on my toes with all my funky colors. I'll eventually get around to trying RCM on my toes, but not until I buy more colors, which I'll definitely do! I also found directions to "sandwich" regular polish between the gel base and top coats, so that is on my list as well.

I hope this review was helpful for anyone curious about this kit, I definitely think it's worth the investment. It pays for itself in 2-3 uses, depending on how much your usual gel mani costs at the salon...that is of course, if you have a steady hand to apply it! Though 30 seconds per coat is honestly 2nd to none, and the LED is a. faster than the UV light, and b. won't damage your skin. Gelish, OPI gel colors and any other LED friendly gels can be used with this system as well.

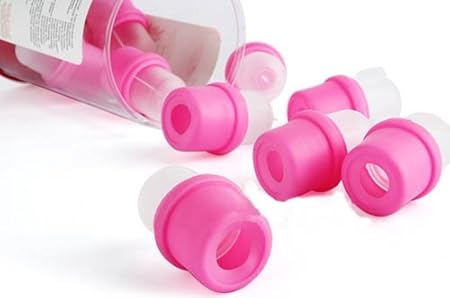
P.s. I may want to invest in something like these to help with removal! 

Happy Polishing!
-Maggie

Thursday, May 9, 2013

Color Club "Modern Pink" & Enchanted Polish "Djinn In A Bottle" Holographic topcoat

Hello friends! Today I'm wearing Color Club's "Modern Pink", a creamy neon bubblegum pink. I'm not going to lie, the formula on this gave me quite a bit of trouble, even after I added thinner to it. This, like "Disco Dress" I reviewed yesterday, dries to a satin-matte finish due to the neon nature of the color. I couldn't quite capture the true brightness of this color, and it too was a bit more red than the camera would show. This was 2/3 coats (depending on the nail) over a coat of Orly Ridgefiller, topped with SH Insta-dri.

But then I decided, why not jazz it up a bit? Enter Enchanted Polish's "Djinn In a Bottle", aka holographic topcoat! This, like almost all of her other polishes, are so hard to come by because they're so brilliant! The formula on her polishes is great, but a lot tends to come out on the brush at once so it's easy to use too much, so be careful! EP's are smooth and quick drying, too! For the picture below I used 2 coats of "Djinn In a Bottle" over the previous manicure.


Like it? Love it? I'm such a fan of EP, I'm super glad I was able to get a hold of some of her shades finally!

Happy Polishing!
-Maggie

Wednesday, May 8, 2013

Enchanted Polish "Lucy In The Sky With Diamonds" and NOTD

Hey everyone! So today I finally got my 2 Enchanted Polish colors in the mail! I'm featuring "Lucy In The Sky With Diamonds" on the blog as well as some other colors I picked up today!

Lucy In The Sky With Diamonds is a pale pearly lilac & chartreuse duochrome + linear holo. It reminds me a bit of OPI's "Significant Other Color" but toned down, plus the holo of course.. and way prettier. I did 2 coats of this over Orly's Ridgefiller base coat to get it to opacity quicker....though I bet this would look really nice as a top coat over something like OPI's "You're Such A Budapest!", a nice pale purple.


On my other hand I'm showing off Color Club's "Disco Dress" with OPI's "Crown Me Already!" accent nail. As you can see, my poor middle nail is short after some carelessness at work yesterday :( For some reason, this purple photographed wayyyyy more indigo-blueish than it really is. It is however a neon shade, as without top coat it dries to a more satin-matte finish. I really dig this purple, especially for summer as it's on the darker side but still bright. The formula on this however, was a bit thick and required some serious thinning to be workable at all. 2 coats on all nails, + SH Insta-dri. As for "Crown Me Already", It's just super brilliant and super dense silver glitters, mostly micros but various sizes of hex glitters that give it tons of depth! Glad I snagged this one off ebay!

Happy Polishing!!
-Maggie

Tuesday, May 7, 2013

Some other old nail art...

So, today I broke one of my fingernails at work :( I decided to offer some older nail art photos that I haven't posted yet...I hope you enjoy!


China Glaze "For Audrey" with glitter gradient tips of butter LONDON's "Tart with a Heart" and "Henley Regatta"

Valentine's Day Mani: OPI "Be a Dahlia Won't You", "Alpine Snow" and "I Lily Love You"

Turquoise effect mani using Old Navy's "Tropical Breeze" and Essie's "Licorice"

Turquoise Mani tutorial HERE (The spray bottle in the photo tutorial has rubbing alcohol in it, though I used good ol' fashioned body spray, which has alcohol as it's first ingredient). It's similar to water marbling, without the issue of swirling colors around and all that nonsense!

Happy Polishing!
-Maggie

P.S. I've got some lovely polishes coming in the mail soon this week!! Something definitely to look forward to :)

Sunday, May 5, 2013

Deborah Lippmann "Cleopatra in New York" and "Rockin' Around The Christmas Tree" ...in May

Hey everyone! These 2 polishes I got on loan from a friend to swatch..she had gotten them as a gift from the department store with another purchase...woo! I don't know if I'd ever spend upwards of $20 on a bottle of nail polish, but these 2 sure are pretty! If you're familiar with either of these colors, you know they're both glitter BOMBS suspended in a black jelly lacquer. Which made them both such a pain in the buns to take off. But I digress...

This one, "Cleopatra In New York", was a BIG BIG hit this holiday season. It's big and small gold hex glitters in the black jelly base. It's opaque in 2 coats, though I did 3 to get the edges a bit more solidified. Which I probably shouldn't have done, because even with pure acetone taking this polish off was a NIGHTMARE. So many layers of big glitters just don't want to come off. I ended up having to scrape and file, and it basically screwed up my nails a bit. :( It is pretty though!.


This one is "Rockin' Around The Christmas Tree", as you can tell by the lovely red and green glitters. This one didn't seem as dense as the above, but definitely had more smaller glitters which made taking it off a bit easier. The formula on both of these was great, nice and smooth, though because of the glitter density you do have to shake 'em around after a couple of nails to keep everything loose.


Sunlight!
Which one do you like better? I'm hoping in the near future to be able to get my hands on a bottle of "Across the Universe", or perhaps the SH dupe "Mermaid's Tale". And if you have any bottles that you'd like to see me feature on here, just let me know!

Happy Polishing!
-Maggie

Saturday, May 4, 2013

NOTD - butter LONDON Fairy Cake and Essie Cute As A Button !

Hello everyone, happy Saturday! It's absolutely gorgeous outside right now, a perfect day to celebrate the Derby! Today I've got a special mani that I've prepared for a semi-formal event I'll be attending later...I shelled out the money to buy "Fairy Cake" just for this, and I don't regret it one bit. I'll definitely be using it a whole ton more in the future!!

If you've read some of my previous posts, you know how much I love Essie's "Cute As A Button"...the formula is smooth, the color is great and glossy, and the drying time is actually quite fantastic, not too fast but not terribly slow. I found it would be the perfect compliment to the mint green/light teal colored dress for later!

Butter LONDON's "Fairy Cake" is a super dense silver and scattered holo glitter...serious glitter bomb. This came out for their Holiday 2012 collection and is now one of their regulars. I feel like its quite similar to "Tart With A Heart" in formula, given that their both all glitter. It thickens up quite fast while you're using it so keep some thinner handy, as well as be prepared to close it and stir it up every few nails to get a nice smooth coat. There was a bit of dragging on the first 2 coats with a few bald patches, but 3 gets you really opaque. I did a full accent nail on both index fingers, as well as my toes, with the glitter gradient tips on the rest with "Cute As A Button" underneath..hope you like!

glitter BOMB!


Ooh, shiny

What do you think?? 

Happy Polishing!
-Maggie

Friday, May 3, 2013

Recent Purchases

First off, you may have noticed that we are officially operating on "heylookatmynails.com"! This domain name is officially mine and nobody can take it from me for a whole entire year! Thanks to everyone for your support, I'm glad I can pour myself into this and know that people will be checking in!

So this week I've been picking up randoms and strays that I happen to find on sale...most are satisfying purchases....however, some are definitely not. Here's what I dug up this week:

This first one I purchased on Tuesday from a Rite Aid while I was biding my time on my lunch break from jury duty (yay!). It's a scattered blue sheer jelly holo from Wet n' Wild called "Blue Wants to Be A Millionaire"..apparently all of the colors in this collection have equally as witty puns as names...all based on TV shows. This is part of their "fastdry" collection, available at most if not all drug stores. Just looking in the bottle you could tell how sheer this is, so I used Orly's ridgefilling base coat to help build the opacity. This is about 4 layers, with a layer of OPI Top Coat over it.

Indoors
Outdoors
You can definitely tell in the second shot how fun this is in the sun... there's also a pinkish scattered holo in this collection but it was a tad too muted for me. Definitely liked this for the price, @ $1.99!!

The next 3 are all Essie shades which are old old old...they were on clearance for $3.99 at the supermarket!

This one is called "Raisinnuts"....it looks a bit more winey than raisin-y to me, but to each his/her own. I liked the formula on this, took only 2 coats and that shine on it is sans-top coat...some Essies are super glossy, like this one! Winner.


 This next color I really love - though it doesn't look too unique, and really reminds me of "Snog" by butterLONDON, I just cant get over how bright it is...its a cool red creme, but definitely bright with a ridgefilling base coat underneath to help it along. The formula was great, 2 coats and super glossy without a topcoat as well. This is called "Rose Bowl", by Essie...how fitting for such a lovely shade. Definitely a color for my toesies this summer!


Alas, occasional we come across shades we think we'll love, and they disappoint us. This is most definitely one of them - I'm not entirely sure what I was thinking, I guess I didn't expect it to make my nails look so darn yellow and diseased (ugh!).  I've also seen varying swatches of this, some more pink than orange...in this case I got stuck with the not-so pink. Super not flattering, and this is as opaque as I could get it. Vom. I think it would look way better on someone with a darker skin tone, so this is up for grabs if anyone wants it...I'll sell it for a dollar...50 cents, anything.

Sorry the photo is blurry....I was frustrated.

Ever have any polishes that you absolutely HATED? Let me know! (Mainly so I can avoid them!!)

Happy Polishing!
-Maggie